A rental emergency can get expensive within hours. In Jacksonville, that risk is higher because hurricane season runs from June 1 to November 30, the city sees about 117 rainy days per year, and a summer AC outage can push indoor temperatures past 100°F fast.
If I were handling a Jacksonville rental, I’d keep this checklist focused on four things:
- Know what counts as an emergency: fire, gas leaks, sewage backup, flooding, power loss, AC failure in extreme heat, and broken exterior locks
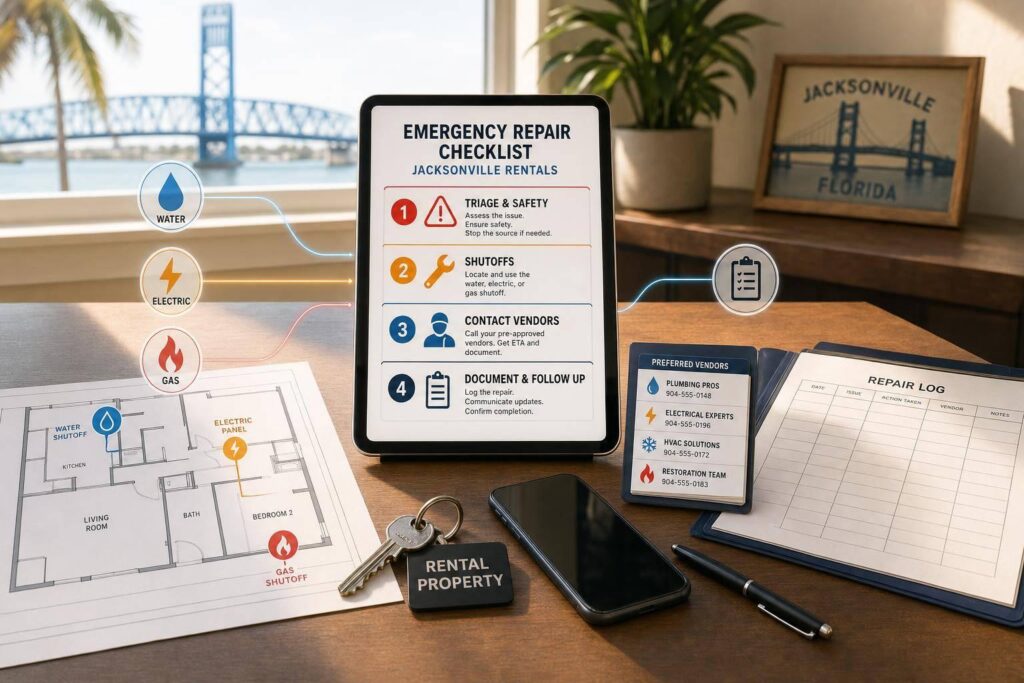
- Prepare before anything happens: keep a 24/7 vendor list, label shutoffs, test alarms, and give tenants written steps
- Act in the first 30 minutes: confirm the issue, give safe instructions, dispatch the right contractor, and update the tenant
- Finish the job the right way: dry wet areas, check nearby units, save photos and messages, and keep records for insurance and Florida habitability rules
A small delay can turn into a big bill. The article points out that a $500 repair can grow into $14,000+ once moisture and mold spread. It also draws a clear line between urgent repairs that need same-day action and lower-priority issues that can wait until business hours.
Here’s the core idea in plain terms: prepare early, respond fast, document everything, and fix weak spots after each incident. That’s the simplest way I know to protect tenants, limit damage, and keep a Jacksonville rental in good shape.
Pre-Emergency Preparation Checklist
Get these pieces in place before an emergency starts.
Build Your Emergency Contact and Vendor List
Every Jacksonville landlord should keep one updated list for urgent situations. Put all your key contacts in one spot so no one is scrambling at 2:00 a.m.
Include 24/7 vendors such as plumbers, electricians, HVAC technicians, roofers, locksmiths, and water mitigation or mold remediation specialists. Add direct numbers for local water, electric, and gas utilities, emergency services, your insurance carrier’s claims department along with the policy number, and your own 24/7 maintenance line.
Storms fill vendor schedules fast, so update this list on a regular basis.
Label Shutoffs and Check Safety Systems
Label the main water shutoff, breaker panel, and any gas valves at each property. Give tenants written directions that explain how to use them during an emergency.
Test smoke alarms and carbon monoxide detectors every month; this is required in Jacksonville. Check GFCI outlets during routine inspections. Before June 1, inspect drainage and moisture control.
Give Tenants Written Emergency Instructions
At move-in, give each tenant a one-page emergency protocol sheet. Spell out when to call 911 for fire, gas leaks, or other life-threatening emergencies. Tell them to use the landlord’s emergency line for flooding, AC or heat failure during extreme weather, and security breaches, and to use the normal portal for everything else.
Also show tenants where the water shutoff and breaker panel are and how to use them. For Jacksonville rentals, add storm prep steps like:
- securing outdoor furniture
- moving vehicles away from trees
- knowing the local evacuation zone
Then send a reminder every year in April or May before hurricane season starts.
These instructions should act as the first filter when an after-hours call comes in.
Set Up an After-Hours Response Plan Before a Crisis
Decide ahead of time how to choose the right property management company to approve emergency repairs after hours and who handles tenant communication, vendor dispatch, and documentation. Set an after-hours spending limit so vendors can begin work at once.
With these steps in place, emergency calls can move straight into triage.
sbb-itb-73b3b1a
Emergency Identification and First-Response Checklist
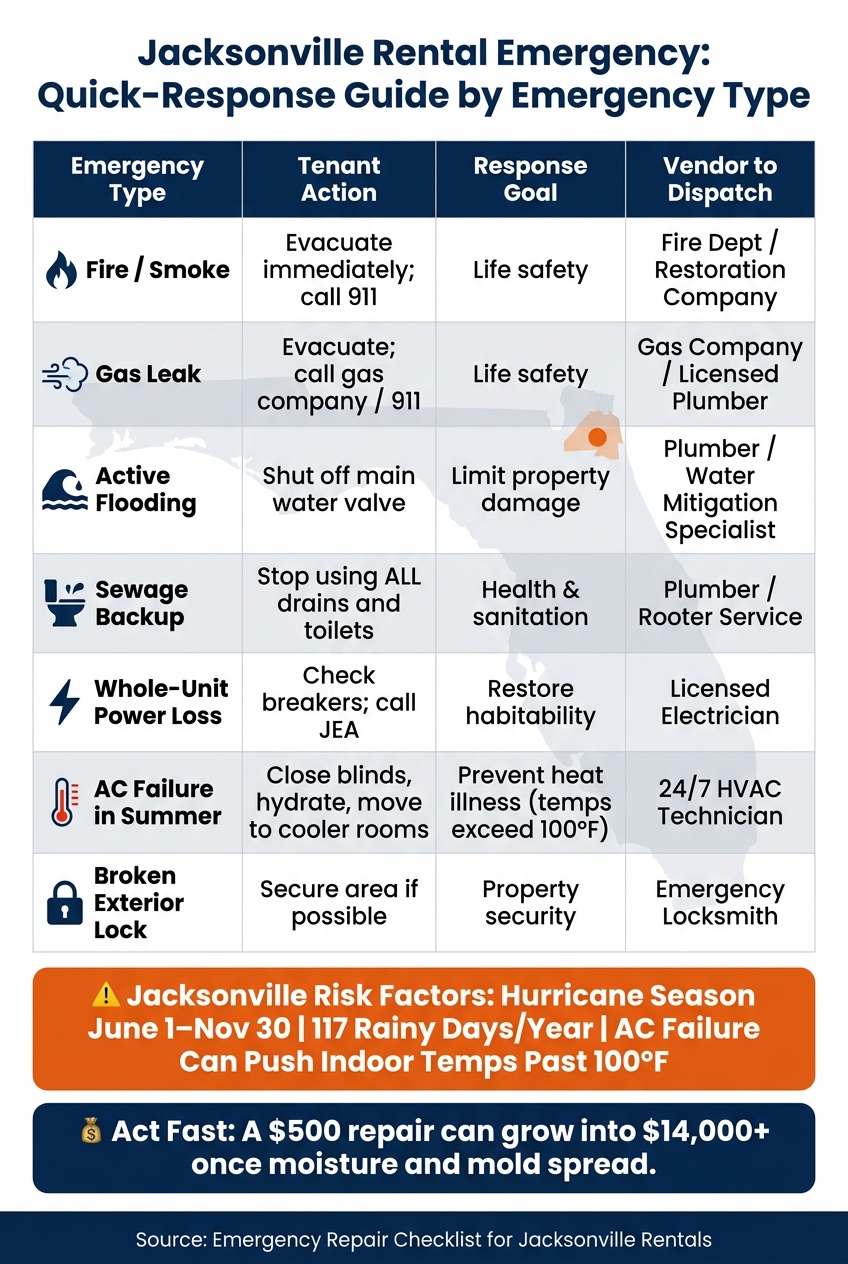
Jacksonville Rental Emergency: Quick-Response Guide by Emergency Type
Once your prep work is done, the next step is triage.
The goal is simple: figure out whether the call involves immediate danger, damage that could get worse fast, or a loss of basic livability. Use your emergency instructions and contact list to confirm what’s happening before you send anyone out.
Health, Safety, and Security Emergencies
These problems need action right away.
Fire or smoke, a gas smell, suspected carbon monoxide exposure, electrical hazards that could lead to a fire, sewage backups, structural damage, and broken exterior doors or locks all belong in this group.
If a tenant reports fire or a gas smell, their first call should be to 911, not to you. Getting out safely comes first. After they’re out and emergency services are on the way, they can call your emergency line.
If there’s a sewage backup, tell tenants to stop using all drains and toilets at once. That helps keep the issue from spreading through the property.
Water, Weather, and Utility Emergencies
Some issues may not look dramatic at first, but they can turn bad in a hurry.
Active plumbing leaks, burst pipes, roof leaks during a storm, flooding, whole-unit power loss, and HVAC failure during peak summer heat all count as emergencies in Jacksonville. Interior temperatures in Florida properties can exceed 100°F within hours of an AC failure in summer.
If there’s active flooding, tell tenants to shut off the main water valve right away. Your written instructions should have already shown them how to do that. Ask for photos or video as soon as possible so you can judge the severity before dispatching a vendor.
Problems That Can Wait Until Business Hours
Not every after-hours call needs a late-night service visit.
A dripping faucet, a tripped breaker the tenant can safely reset, a single appliance failure like a dishwasher, minor cosmetic damage, or routine pest issues usually don’t call for a midnight vendor dispatch. These can wait until business hours.
Comparison Table: Emergency Type, Tenant Action, Response Goal, and Vendor
| Emergency Type | Tenant Action | Response Goal | Vendor to Dispatch |
|---|---|---|---|
| Fire / Smoke | Evacuate; call 911 | Life safety | Fire Dept / Restoration |
| Gas Leak | Evacuate; call gas company / 911 | Life safety | Gas Company / Plumber |
| Active Flooding | Shut off main water valve | Limit property damage | Plumber / Water Mitigation |
| Sewage Backup | Stop using all drains and toilets | Health & sanitation | Plumber / Rooter Service |
| Whole-Unit Power Loss | Check breakers; call JEA | Restore habitability | Licensed Electrician |
| AC Failure in Summer | Close blinds, hydrate, and move to cooler rooms | Prevent heat illness | 24/7 HVAC Technician |
| Broken Exterior Lock | Secure area if possible | Property security | Emergency Locksmith |
Once you’ve classified the call, move to the response checklist below.
Step-by-Step Emergency Repair Response Checklist
Once you’ve classified the emergency, act right away.
First 30 Minutes: Confirm the Problem and Limit Damage
Start with the same triage order from the last section: safety first, property damage second.
Call the tenant back and confirm the exact location of the problem, what they see or smell, and whether anyone is in danger. Ask for photos or a short video as soon as possible.
At the same time, give the tenant one or two safe, specific steps they can take right now. For a burst pipe, tell them to shut off the main water valve. For an electrical issue, tell them to flip the breaker if it’s safe to reach. Small actions like these can cut down on damage before help gets there.
Log everything immediately:
- Time of the report
- What was reported
- Instructions you gave
- Dispatch time
Dispatch Vendors and Communicate Timelines
Once the situation is clear, contact the right contractor from your pre-vetted list. Be precise. Instead of saying “there’s a leak,” say something like: “active leak from the second-floor bathroom reaching the unit below; main valve is shut off.” That kind of detail helps the vendor arrive prepared and avoids extra calls back and forth.
When the vendor gives you an ETA, update the tenant right away. Tell them:
- Who is coming
- The estimated arrival time
- Whether they need to be there or if entry is arranged another way
- Whether a temporary utility shutoff is part of the repair
People deal with interruptions better when they know what’s coming.
If the repair won’t be finished in one visit, shift right away to temporary protection and occupant safety.
Protect Occupants and Secure the Property
If the repair carries into the next day, make sure the property is safe and livable before the day ends.
Board up broken windows or exterior openings with plywood. After water intrusion, start drying the area right away with fans and dehumidifiers. In Jacksonville, humidity can speed up mold growth if moisture sits too long. If the unit is uninhabitable, or if a utility has to stay off for safety, explain any temporary accommodations to the tenant and document the plan.
Next Day: Verify Repairs, Check for Secondary Damage, and Review Costs
Once the immediate crisis is under control, confirm the repair and look for hidden damage.
Verify the work yourself or have the vendor send photos. In multifamily properties, check the units above, below, and next to the repair area for signs of migrating water or electrical trouble.
Watch closely for hidden moisture, mold, or mildew after any water-related emergency. After you confirm the repair held, review the vendor invoice line by line. Then compare the total cost against your insurance deductible. If the damage is serious, compare the repair bill with the deductible before filing a claim.
Documentation, Florida Compliance, and Final Checklist
Record the Timeline, Photos, Vendor Work, and Tenant Messages
Once the repair is stable, close out the incident with a full record. That file can help in disputes, back up insurance claims, and give owners a clear account of what happened.
Write down each step with timestamps, including:
- when the tenant first reported the issue
- when the vendor was dispatched
- when the vendor arrived
- when the repair was confirmed complete
Match that timeline with before-and-after photos or videos. Save all texts, emails, and communication notes with the tenant during the incident.
Good records can speed up claims and help protect owners if someone later disputes the damage, the timing, or both.
Keep the vendor’s invoice, repair notes, and contact details in the same file. Then send a short completion summary to the tenant and owner, and confirm the issue has been resolved.
With the file wrapped up, make sure the repair also lines up with Florida habitability rules.
Florida Entry and Habitability Rules to Keep in Mind
Florida Statute 83.51 requires landlords to keep plumbing, HVAC, and structural systems code-compliant and habitable. Water intrusion and other problems that threaten habitability can lead to tenant remedies if they aren’t handled.
In an emergency, landlords may enter to prevent more damage or restore habitability.
Update Your Checklist After Each Incident
After the legal and vendor side is done, look back at what slowed the response. If a vendor took too long to answer, swap them out. If the tenant didn’t know where the water shutoff was, update your written instructions and think about labeling shutoffs more clearly.
When the same kind of repair keeps showing up – roof leaks, HVAC failures, drainage issues – it’s a sign to adjust your preventative maintenance calendar or look at a tougher upgrade, such as better drainage or reinforced roofing. And if the repair came with a big bill, use that moment to revisit your reserve budget. A general target of 1%–3% of property value set aside for repairs can help cover future costs without a last-minute scramble.
Conclusion: Emergency Repair Checklist for Jacksonville Landlords
Build the system before the emergency. Respond fast. Document each step. Then fix one weak spot after every incident. If handling that across several Jacksonville properties starts to feel like a full-time job, 1 Realty Management offers full-service property management and maintenance support for Jacksonville rental owners.
FAQs
What is considered a rental emergency in Jacksonville?
In Jacksonville, a rental emergency is a problem that puts a tenant’s health or safety at risk right away, makes the unit unsafe to live in, or may lead to major property damage if no one acts fast.
That can include:
- Gas leaks
- Active flooding or burst pipes
- Electrical hazards
- Total power outages
- Sewer backups
- Heating or air conditioning failures during extreme weather
In situations like these, landlords may enter the property without the usual 24-hour notice.
How fast should a landlord respond to an emergency repair?
For true emergencies like gas leaks, flooding, or electrical hazards, the response should be immediate to protect both tenants and the property.
Some rules may allow up to 24 hours. But in cases like these, waiting can make a bad situation much worse. The issue should be checked right away to reduce damage and keep people safe.
In Florida, landlords may enter for these emergency repairs without the usual 24-hour notice.
What should tenants do before help arrives?
Tenant safety comes first. If there’s an immediate threat to life or safety, such as a fire or gas leak, tenants should leave the property right away and call emergency services.
For other urgent repairs, they should follow their management team’s safety instructions. That may mean shutting off the water for a burst pipe or turning off the electricity if there’s a fire hazard. They should also stay in touch with their property manager and share updates until help arrives.