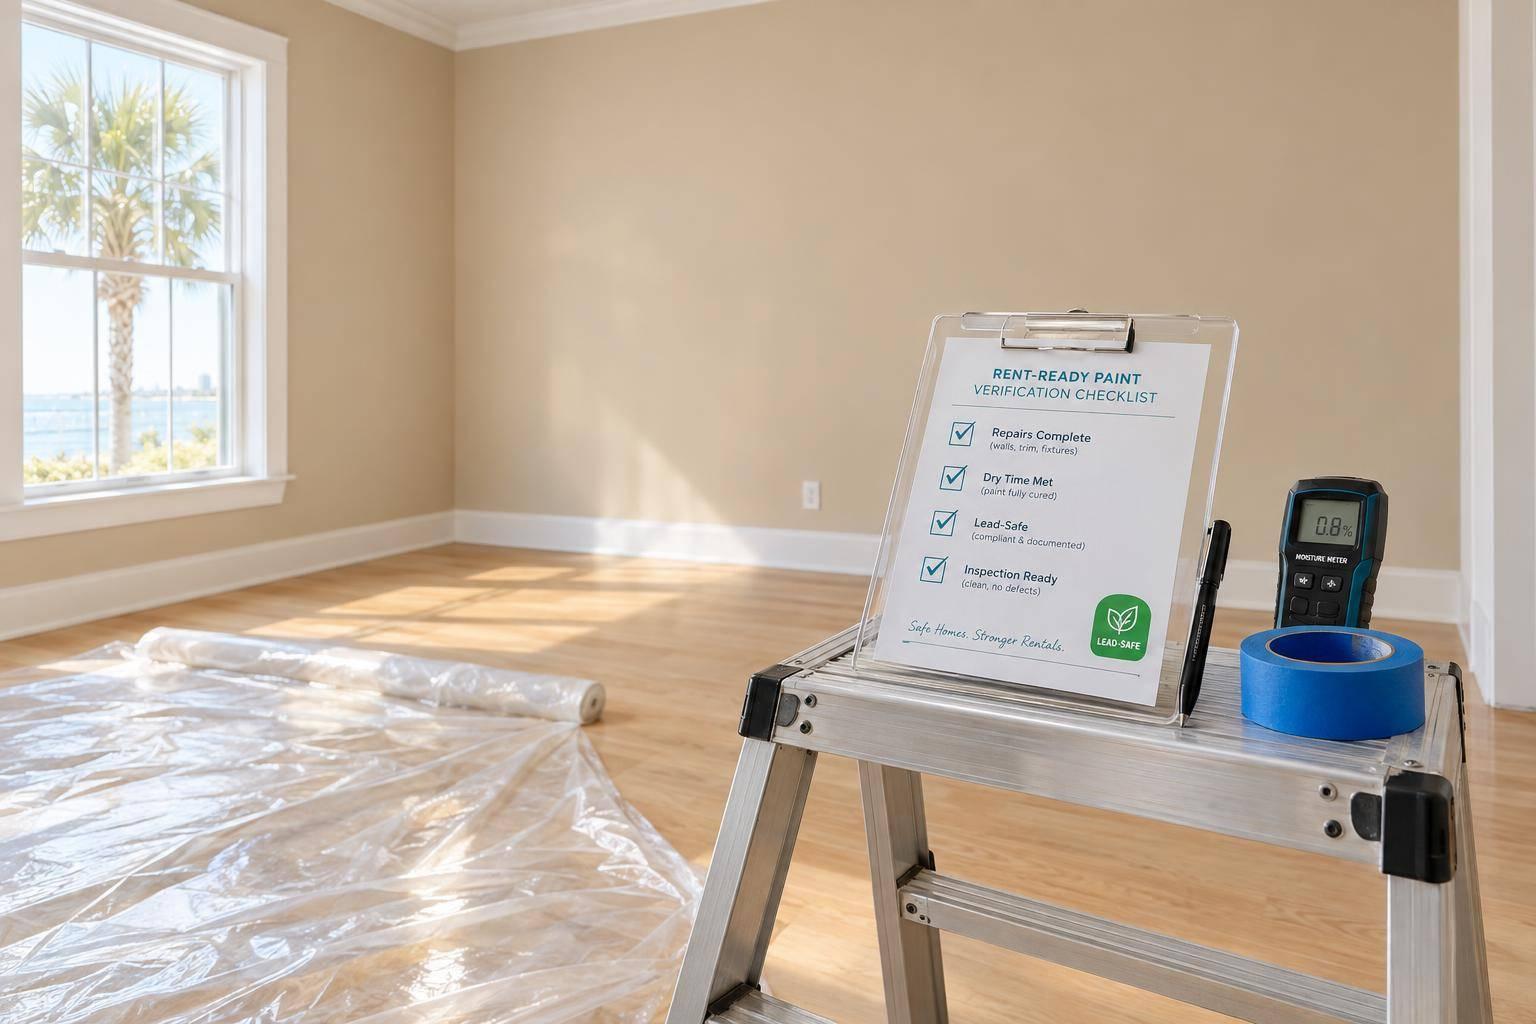
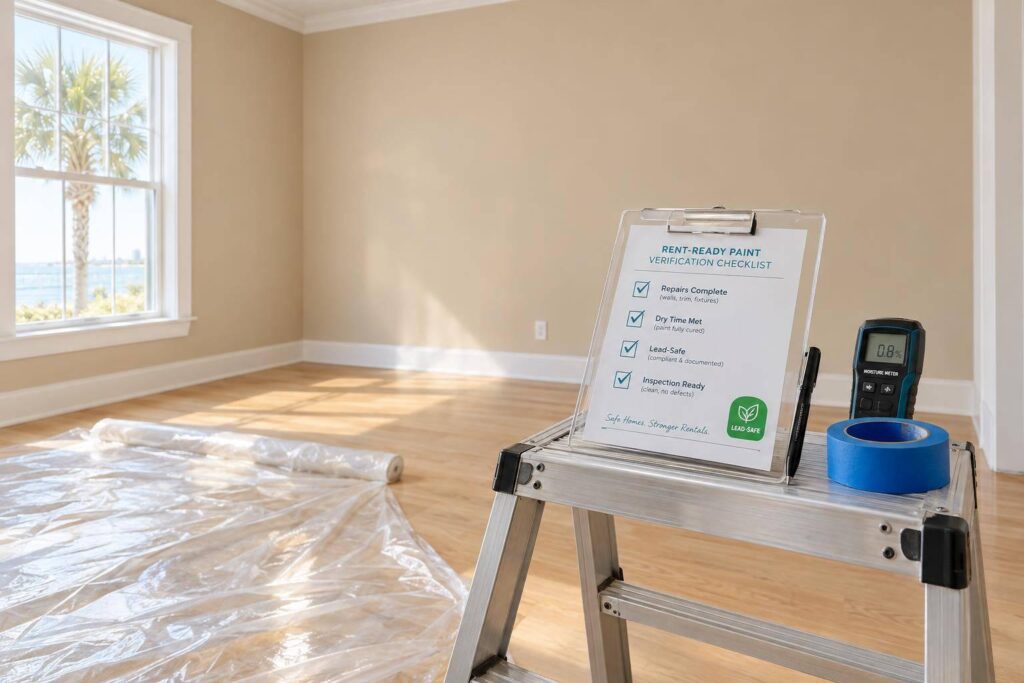
I plan a Jacksonville paint turnover around repairs and drying – not just painting. Fix moisture problems first, clean before deciding what needs paint, and check lead-safe rules before disturbing paint in rentals built before 1978.
Here’s the order I follow to get a unit ready:
- Inspect and document: Photograph each room, compare move-in records, and choose cleaning, touch-ups, or full-wall painting.
- Repair and paint: Resolve hazards, patch damage, prime, and select finishes suited to each surface.
- Budget and schedule: Estimate supplies, get itemized quotes, save paint details, and allow for humidity, ventilation, and product cure times.
- Review deposit charges: Separate routine wear from documented tenant-caused damage. Florida generally requires a deposit return within 15 days if there’s no claim, or a claim notice within 30 days after the tenant vacates.
- Inspect and save records: Finish corrections, confirm the unit is ready for use, and save final photos and the incoming tenant’s condition report.
My rule: <u>dry to the touch does not mean ready for move-in</u>. I follow the product’s instructions and keep turnover costs separate from deposit deductions.
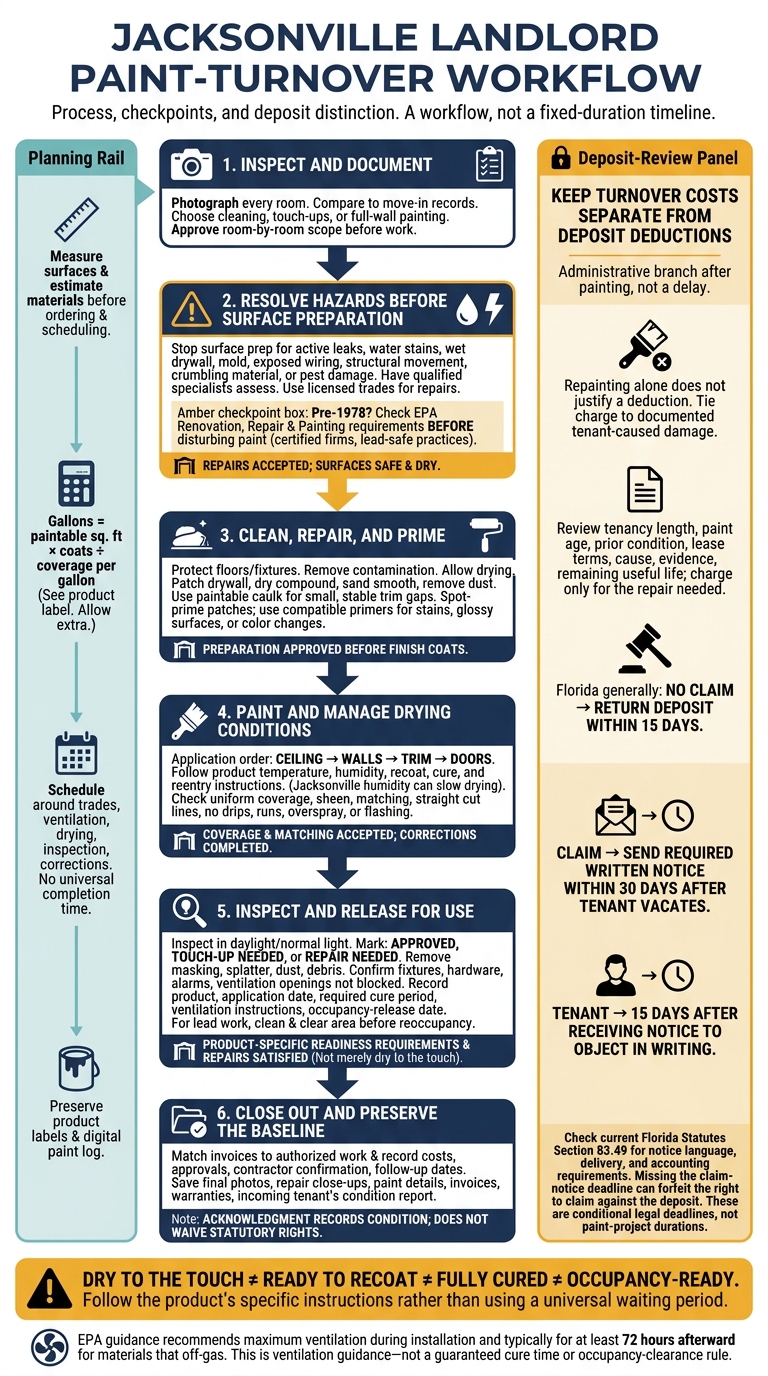
Jacksonville Rent-Ready Paint Turnover Workflow
Repair Surfaces Before Painting
Once the unit is dry and safe, move from finding the problem to making repairs.
Address Hazards and Get Specialist Assessments
Stop surface prep if you find active leaks, recurring water stains, wet drywall, suspected mold, exposed wiring, structural movement, large areas of crumbling material, or pest damage. Have qualified specialists assess these problems. Use licensed trades for electrical, plumbing, roofing, or HVAC repairs. Recurring cracks need a diagnosis – not another layer of compound.
For rentals built before 1978, check EPA Renovation, Repair and Painting (RRP) requirements before disturbing paint. For covered work, review requirements for certified firms and renovators, pre-renovation information, lead-safe containment, dust control, cleanup, and waste handling.
Clean Surfaces and Repair Drywall
After the site is safe and dry, prepare surfaces for patching and paint. Protect floors and fixtures, remove hardware where safe, and scrape away loose paint, adhesive, and failed caulk. Use a cleaner suited to the surface to remove grease, smoke film, dirt, and other contamination. Rinse away residue and let the surface dry.
Fill small holes with patching compound. For larger damage, install a supported drywall patch, tape the joints, and apply compound in thin coats. Repair damaged corner bead instead of covering it with filler. Let each coat dry, sand it smooth, and remove the dust.
Use paintable caulk only for small, stable gaps in trim. It’s not a fix for leaks, deteriorated wood, or recurring cracks.
Prime Surfaces and Follow the Painting Order
Once repairs are complete, seal patched areas before applying finish coats. Spot-prime patches and exposed drywall. Use stain-blocking primer for water or smoke stains after their cause has been fixed, bonding primer for hard-to-coat glossy surfaces, and a compatible primer for strong color changes. Follow each product’s instructions.
Paint the ceiling first, then walls, trim, and doors. Check for ridges, runs, and missed spots between coats. Dry to the touch, ready to recoat, and fully cured are separate stages, and humidity can slow each one. Wait until the paint has fully cured before reinstalling hardware.
sbb-itb-73b3b1a
Choose Paint and Plan the Turnover
Choose the Right Finish for Each Surface
After repairs and priming, select the finish before ordering materials. Match the finish to how the room is used – not just the sheen. Performance depends on the product, surface, preparation, and application. Mildew-resistant paint won’t solve moisture problems, and a low-VOC label doesn’t mean occupants can return immediately.
| Finish | Washability | Hides imperfections | Suitable rental location | Key drawback |
|---|---|---|---|---|
| Flat or matte | Low to moderate, depending on product | Best at minimizing minor surface defects | Ceilings and low-contact areas | Marks more easily and may burnish during cleaning |
| Eggshell | Moderate to good | Hides more defects than glossier finishes | Bedrooms, living rooms, dining rooms, general wall areas | Not as scrub-resistant as satin or semi-gloss |
| Satin | Good to very good | Shows more surface irregularities than eggshell | Hallways, kitchens, bathrooms, laundry rooms, entryways | Can highlight patching, roller marks, and uneven drywall |
| Semi-gloss | Very good | Least able to hide imperfections | Trim, doors, baseboards, and selected wet-area surfaces | Higher sheen can emphasize flaws and produce glare |
Estimate Supplies and Keep Paint Records
Calculate gallons = paintable square feet × coats ÷ coverage per gallon, using the coverage rate on the label. Measure walls, ceilings, trim, and doors separately, then subtract large openings. Allow extra for porous or textured surfaces, color changes, application loss, and future touch-ups.
Include paint, primer, tools, masking materials, patching and cleaning supplies, protective gear, labels, sealed containers, and disposal materials. In the digital paint log, record the purchase date, leftover quantity, contractor, storage location, and label photos.
Build the budget from current quotes and receipts, not assumptions. Track materials, preparation, repairs, labor, protection, disposal, cleaning, taxes, and contingency separately. Specify who supplies each item, and require written approval for extra work.
Schedule Contractors, Drying, and Final Approval
Once you’ve selected the finish, schedule painting around drying time and other trades. Request itemized quotes based on the approved scope. Specify repaint priorities, surfaces – including closets – colors, sheen, coats, preparation, protection, and touch-up duties.
Require ventilation, daily cleanup, debris removal, and reporting of concealed damage. Set clear acceptance standards: uniform coverage and sheen, straight cut lines, and no drips, runs, overspray, flashing, or paint on hardware. Confirm paint matches using product records or a physical sample, and spell out how unacceptable touch-ups will be corrected.
Use that same scope to keep quotes, schedules, and approvals aligned.
| Task | Dependency | Scheduling position | Approval point | Required documentation |
|---|---|---|---|---|
| Inspection and scope | Possession returned | First | Scope approved | Dated photos, measurements, itemized quote |
| Leak, electrical, plumbing, and HVAC repairs | Defects identified | Before painting | Repairs accepted | Invoices, repair photos, permits if required |
| Drywall and surface preparation | Repairs complete; surfaces dry | Before finish coats | Prep accepted | Prep checklist, concealed-damage notes |
| Painting | Prep approved; conditions suitable | Core painting window | Coverage and matching accepted | Product log, progress photos, change orders |
| Final cleaning and inspection | Trades finished; paint ready to inspect | Separate final window | Corrections completed | Cleaning checklist, punch list, final photos |
Use HVAC and dehumidification to keep conditions within the product’s temperature and humidity limits. Follow the label’s cure and reentry instructions. EPA guidance recommends maximum ventilation during installation and typically for at least 72 hours afterward for materials that off-gas. Reserve time for inspection without promising a fixed completion date.
Review Tenant Damage Before Deposit Deductions
After painting is complete, review what qualifies as ordinary wear and what the tenant caused before deducting from the deposit. Repainting alone does not justify a deduction. The charge must be tied to documented tenant-caused damage.
Compare Normal Wear and Possible Tenant Damage
Use these examples as a starting point – not automatic grounds for a charge.
| Normal wear | Tenant-caused damage |
|---|---|
| Fading from sunlight or aging | Repainting in an unapproved color |
| Minor scuffs from ordinary use | Large holes, broken drywall, or extensive anchor damage |
| A few small picture-hanging holes | Numerous holes, oversized anchors, or damage from fixtures installed without permission |
| A finish at the end of its useful life | Marker, crayon, or severe stains requiring specialized treatment |
| Light marks needing cleaning or touch-ups | Water damage caused by tenant negligence |
Before assigning responsibility, review the tenancy length, paint age, prior condition, lease terms, cause of the damage, and supporting records. No single condition automatically makes a charge deductible.
Keep Evidence and Check Florida Deposit Rules
Match move-out photos with move-in records by room, wall, and surface. Keep inspection notes that show each defect’s size and location, along with tenant communications, relevant lease clauses, paint records, estimates, and invoices.
In Jacksonville, document whether moisture damage came from humidity, an unresolved leak, or the tenant’s failure to report it before assigning charges.
Charge only for the repair needed, and separate deductible repairs from routine turnover costs. Account for the paint’s age and remaining useful life. Don’t automatically charge for a full-room repaint or brand-new finishes when localized repairs would work.
Before withholding funds, check the current Florida Statutes Section 83.49. Generally, return the deposit within 15 days if making no claim. Otherwise, send the required written notice within 30 days after the tenant vacates. The tenant has 15 days after receiving notice to object in writing.
Check the current notice language, delivery method, and accounting rules, and keep proof of delivery. Missing the claim-notice deadline can forfeit the right to claim against the deposit. For disputed claims, consult a qualified Florida landlord-tenant attorney.
Once the claim file is complete, proceed to the final inspection, close the work order, and save the move-in record.
Finish the Inspection and Move-In Records
Once corrections are complete, use the final walkthrough to close out the work order and document the unit’s move-in condition.
Inspect the Paint and Close the Work Order
After the paint receives final approval, check each room against the approved scope in both daylight and normal indoor light. Look for missed spots, uneven sheen, patches, drips, and flashing on all painted surfaces. Mark each room approved, touch-up needed, or repair needed. Photograph and log any imperfections accepted as-is.
Remove masking, splatter, dust, and debris. Make sure paint or other materials haven’t covered or blocked outlets, switches, smoke alarms, carbon monoxide alarms, HVAC vents, return grilles, window tracks, locks, door hardware, plumbing access panels, or appliance connections. Test doors, windows, switches, and ventilation grilles for normal operation. In Jacksonville’s humidity, investigate musty smells, condensation, or new bubbling before approving the unit.
Dry to the touch is not occupancy-ready. Follow the product label’s instructions for recoat time, ventilation, handling, and full cure. Keep restricted areas closed until the coating and related repairs are ready for use. Record the product used, application date, required cure period, ventilation instructions, and occupancy-release date. For lead-related work, clean and clear the area before reoccupancy.
Close the work order with the inspector’s approval, completion date, actual costs, contractor confirmation, and a follow-up date for any open items.
Save Final Photos and Move-In Condition Records
After the unit passes inspection, use final photos and condition records to establish the move-in baseline for future damage comparisons. Take wide room views from consistent positions, followed by close-ups of repairs and imperfections left as-is. Store original files by property, unit, room, and date. Keep paint details, application dates, touch-up locations, invoices, and warranties with those records.
Give the incoming tenant a room-by-room condition form and a copy of the completed record. Explain the deadline and method for submitting written discrepancies under the lease or management process. Request dated photos that show each issue’s exact location, and keep the signed or acknowledged form along with any corrections. Acknowledgment records condition; it does not waive statutory rights.
Jacksonville Rent-Ready Paint Checklist
Use this checklist to confirm the turnover is complete before closing the file.
- Before work: Confirm the room-by-room scope, dated before photos, resolved hazards, and any required lead-safe compliance for pre-1978 units.
- Before coating: Check that cleaning, patching, sanding, and dust removal are complete. Verify primer and finish compatibility, material estimates, and the contractor’s written scope.
- Before approval: Follow the product’s dry, recoat, and cure times, accounting for Jacksonville humidity. Keep the job open until final corrections are complete and the required cure time has passed.
- Before closeout: Match invoices to authorized work. Keep turnover costs separate from the deposit-deduction review, and save final photos and the move-in condition report with the completed work order.
FAQs
How can I tell if touch-ups will blend?
Clean the surface, patch cracks, and repair drywall before painting. Choose a neutral paint color for worn areas. Once you’ve touched up scuffed walls, trim, and doors, check them under normal lighting to make sure the color and finish match the surrounding paint.
Next, complete repair, safety, and habitability checks. Document the condition with timestamped photos and a move-in condition record.
How much should I budget for repainting my rental?
Base repainting costs on the property’s condition and the work planned, not a fixed percentage. Costs can change until the move-out inspection. A new coat of neutral paint is a cost-effective way to attract better tenants and support higher rents.
Include painting in your overall maintenance budget, which generally runs 1%–3% of the property’s value per year. Keep a separate cash reserve of $5,000–$10,000 for unexpected needs or major upgrades.
How do I prorate paint damage charges?
Compare the move-in and move-out condition records to separate normal wear and tear from tenant-caused damage beyond what the lease allows.
Next, estimate how much useful life the paint had left. Paint commonly lasts three to five years. If the damage happens before that period ends, you may charge for the paint’s remaining value – not the full cost of a new paint job.