
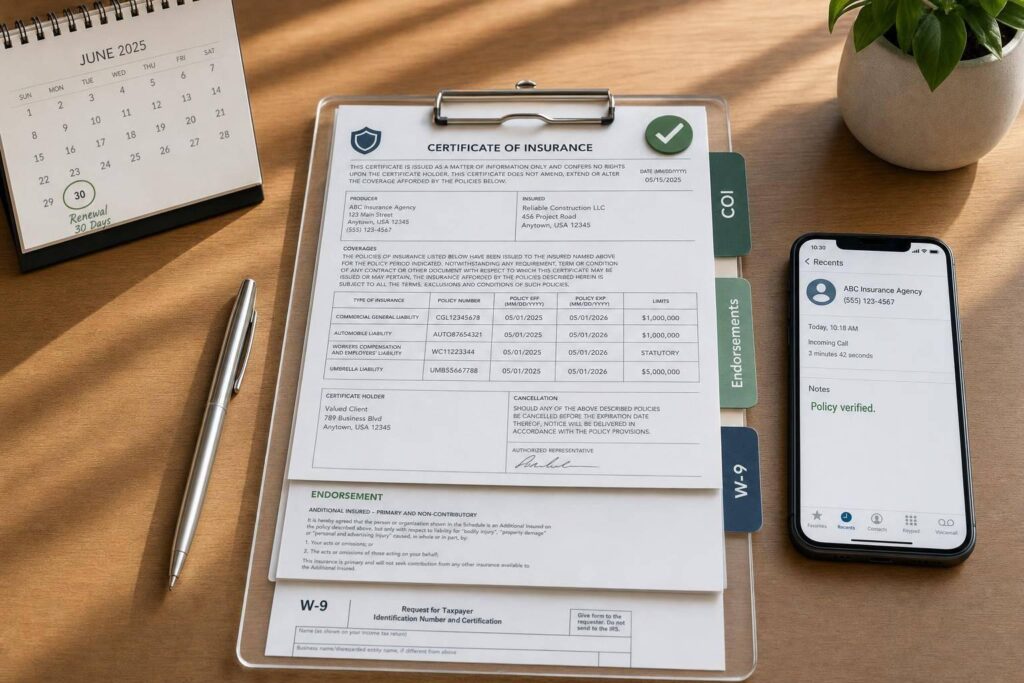
One bad vendor claim can cost you thousands of dollars. If I hire a vendor for a Jacksonville rental, I need to check four things before work starts: the required policies, the right documents, direct policy status, and renewal dates.
Here’s the short version:
- I set insurance rules before hiring the vendor
- I ask for the COI, endorsements, declarations page, and W-9
- I confirm the policy is still active with the carrier or broker
- I log expiration dates and stop work if coverage lapses
A COI by itself is not enough. It only shows coverage on the date it was issued. If a policy is canceled a week later, that old COI will not show it.
My basic check looks like this:
| Check | What I confirm | Why it matters |
|---|---|---|
| Legal business name | Matches the W-9 and contract | Stops entity mismatch issues |
| Policy dates | Active for the full job period | Stops gaps in coverage |
| Limits | Meet contract minimums | Cuts out underinsured vendors |
| Endorsements | Additional insured, waiver of subrogation, primary/non-contributory | Helps shift claim handling to the vendor’s policy |
| Direct verification | Carrier or broker confirms status | Catches lapses or cancellations |
| Renewal tracking | Updated proof before expiration | Keeps coverage in place until work ends |
If I skip these steps, I may end up dealing with injury claims, repair bills, lost rent, or payment fights. In storm season and emergency repair work, that risk can go up fast.
This article walks through the exact checks I’d use to review vendor insurance, flag problems, and keep my vendor file up to date.
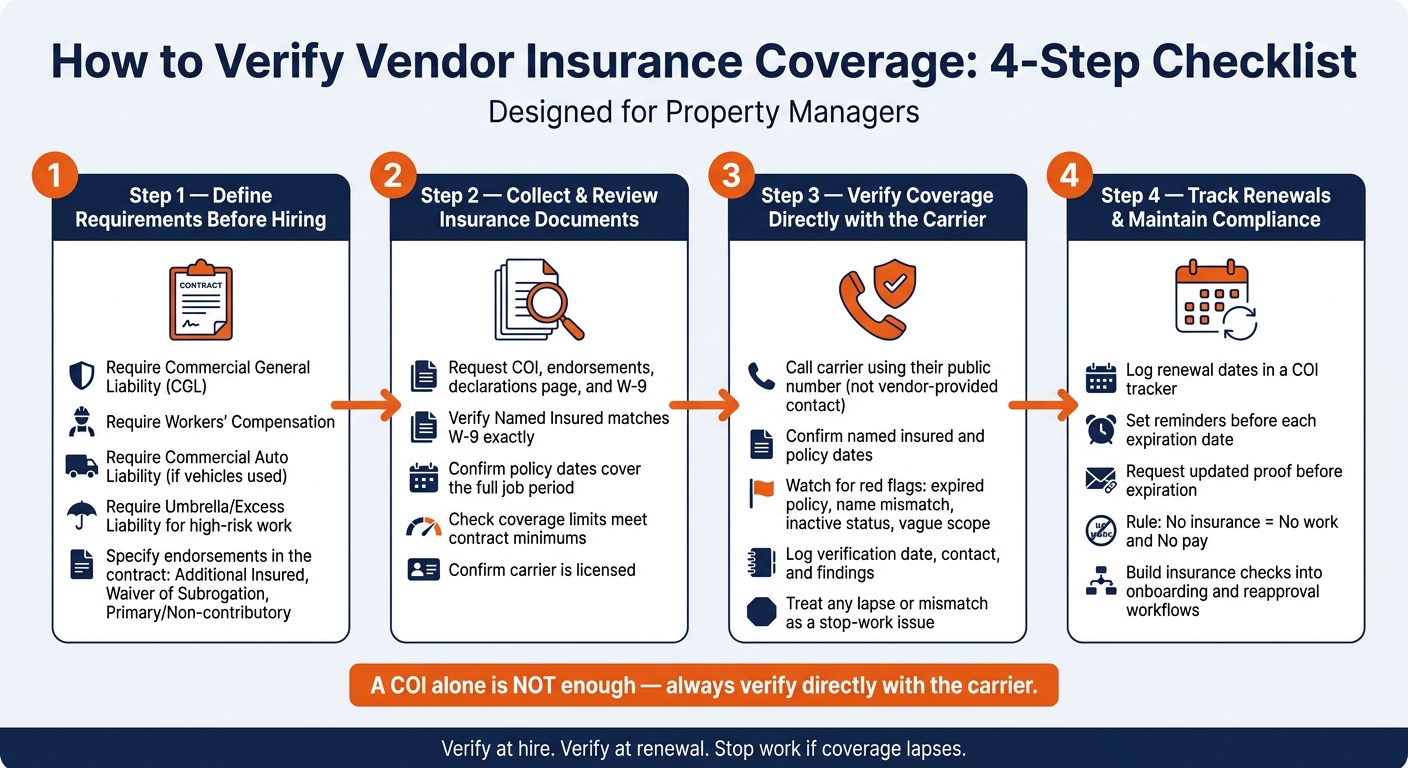
How to Verify Vendor Insurance Coverage: 4-Step Checklist
Step 1: Define insurance requirements before hiring the vendor
Ask about insurance in writing before any work is scheduled. Put those requirements in the vendor agreement from the start. That way, when you verify coverage later, you’re checking against clear contract terms – not making judgment calls on the fly.
List the core policies and minimum limits required
Set the rules before you ask for documents. Each vendor agreement should state exactly which policies the vendor must carry and the minimum limits for each one.
The main coverages to require are:
- Commercial General Liability (CGL)
- Workers’ Compensation
- Commercial Auto Liability if the vendor uses vehicles on the job
- Umbrella/Excess Liability for higher-risk work such as roofing, electrical, or tree removal
This sounds basic, but it’s where a lot of teams get tripped up. If the contract is vague, the review gets messy fast.
Require the right endorsements for your property
List the needed endorsements in the contract, then confirm them with the actual endorsement forms – not a COI checkbox.
- Additional Insured Status – Adds you and the property owner as additional insureds
- Waiver of Subrogation – Prevents the insurer from recovering from you after a claim
- Primary and Non-contributory Wording – Makes the vendor’s policy primary
Without these, a COI may look fine on paper while still leaving you exposed.
Apply a consistent standard across your portfolio
Use one insurance checklist across your full portfolio to cut gaps and make reviews easier. Clear, uniform contract language leaves less room for confusion. Then use that same checklist when you review each COI in the next step.
sbb-itb-73b3b1a
Step 2: Collect the right insurance documents and review the COI line by line
Once your requirements are set, get the full insurance package before you approve any work. Then check each document against those requirements. This is where a lot of teams get tripped up: the COI looks fine at a glance, but the details tell a different story.
Request the COI, endorsements, and declarations page
Ask for the COI, endorsements, declarations page, and W-9. Have the broker or carrier send all documents directly. That extra step helps cut down on altered or incomplete paperwork.
If the job calls for it, ask for any related professional or trade licenses too.
Check names, policy dates, carriers, and coverage limits
Start with the Named Insured field. It should match the vendor’s legal business name exactly as it appears on the W-9 and state registration records. Even a small mismatch can be a red flag.
Next, review the policy dates. The coverage needs to stay active for the full service period, with no gaps.
Then check the carrier information and confirm the policy came from a licensed carrier or agent. After that, compare the limits on the COI with the minimum limits in your contract. If the limits don’t meet the contract terms, reject the document set.
Compare contract requirements against the COI findings
Use this quick check to spot mismatches fast.
| Verification Field | What to Check | Source Document |
|---|---|---|
| Named Insured | Matches the vendor’s legal name on the W-9 and state registration records | COI + W-9 |
| Policy Dates | Covers the full work period with no gaps | COI Policy Period |
| Coverage Limits | Meets or exceeds contract minimums | COI Limits Column |
| Carrier | Licensed and clearly identified | COI Header |
| Additional Insured | Names the manager or owner explicitly | Endorsement Form |
Any mismatch is a stop-work issue. If something is missing or doesn’t line up, move to direct carrier verification in the next step.
Step 3: Verify coverage directly and document red flags
After you review the paperwork, verify the policy directly with the insurer or broker. Use the carrier’s public phone number or email address, not the contact details provided by the vendor. That extra step matters. A COI can look fine on the surface and still miss a gap that only the carrier can confirm.
Check the named insured and the policy dates. If you find a lapse, cancellation, or any mismatch, treat it as a stop-work issue. No gray area there. This is how you catch problems the COI simply can’t show.
Watch for common warning signs before approving work
Some warning signs jump out once you know where to look. A name mismatch between the COI and the contract or invoice can mean the policy doesn’t cover the company that’s actually doing the job. An expired policy leaves you on the hook if something goes wrong on-site. And a vague scope of work often points to a policy that may not cover the exact work being done.
If a vendor stalls, delays, or refuses to send insurance documents, that’s a problem too. Don’t approve the work and hope for the best.
Use this table to flag issues fast:
| Red Flag | Risk Exposure | Verification Action |
|---|---|---|
| Expired policy | No coverage for damages or injuries during the job | Check expiration dates on the COI and carrier confirmation |
| Inactive status | Vendor may be operating without legal authorization | Confirm active status directly with the carrier |
| Name mismatch | Policy may not cover the legal entity doing the work | Compare the COI named insured to the contract or invoice |
| Vague scope | Policy may exclude the specific work being performed | Request a detailed scope of work and compare to policy endorsements |
Record the verification result in a review log
Log every verification call or portal check right away. Record:
- The date of verification
- Who made the contact
- What was confirmed
- The policy expiration date
- Any follow-up actions needed
That gives you an audit-ready trail if questions come up later.
Keep all COIs, endorsements, and verification notes in one central digital folder or system. Then use the expiration dates from your log to track renewals in Step 4.
Step 4: Track renewals and keep vendor compliance current
Checking insurance once at the start isn’t enough. After that first review, you need to track renewals until the job is finished.
Set reminders before policies expire
Log each vendor’s renewal date and next verification deadline in your COI tracker. Then set reminders ahead of each expiration date and ask for updated proof right away.
If a vendor doesn’t send updated proof of coverage by the expiration date, stop all work at once. A simple rule helps here: no insurance, no pay when coverage isn’t current.
Build insurance checks into your vendor management process
After you start tracking renewal dates, make insurance review part of every vendor onboarding and reapproval step. In plain terms, insurance checks shouldn’t sit off to the side. They should be built into your onboarding and renewal workflows from day one.
1 Realty Management integrates insurance compliance checks into its broader maintenance and property management workflows to reduce risk for Jacksonville property owners.
Conclusion: The key checks every property manager should complete
Protecting your rental property from vendor liability takes steady follow-through, not a one-time review. Set your insurance requirements before hiring, collect and review the right documents, verify coverage with the carrier, and track renewals so coverage doesn’t lapse while work is still in progress.
FAQs
Why isn’t a COI enough?
A COI only shows that insurance was in place at a single point in time. That’s it. It does not prove the coverage matches your contract terms or stays active while the vendor is on the job.
It can also leave out details that matter, like coverage limits, policy type, exclusions, cancellation or non-renewal terms, and whether the certificate is correct and up to date for each project.
Who should verify the policy status?
The property manager or the property owner’s designated property management team should verify the policy status.
Before any work starts, they should review the vendor’s or contractor’s insurance documents, usually including certificates of insurance, to make sure coverage is current and fits the job.
What if a vendor’s insurance expires mid-job?
If a vendor’s insurance expires in the middle of a job, stop work right away until they send updated proof of coverage.
State law and property standards require licensed and insured professionals. If work continues without active insurance, the property owner can face major liability. Keep detailed repair records and up-to-date insurance certificates for every contractor working on your property.