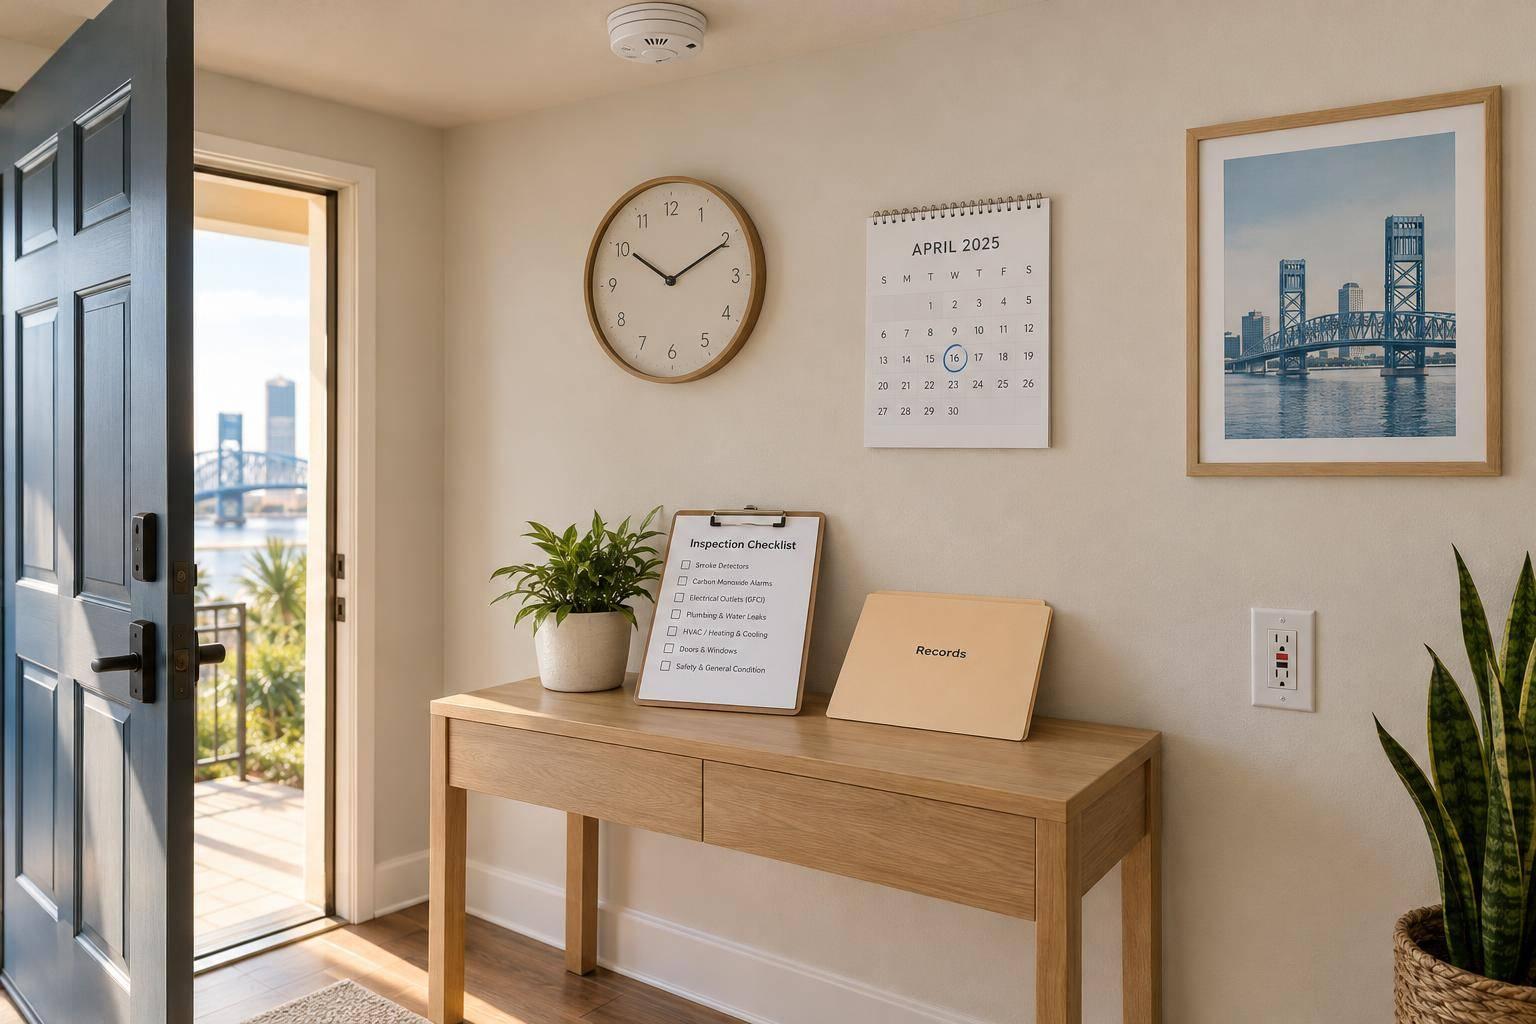
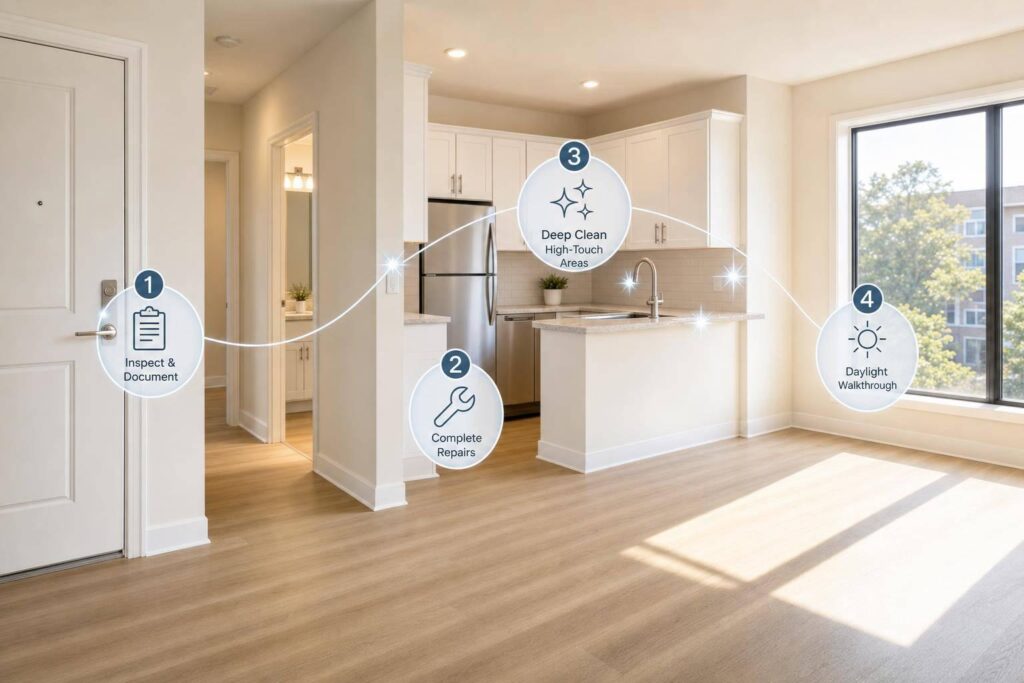
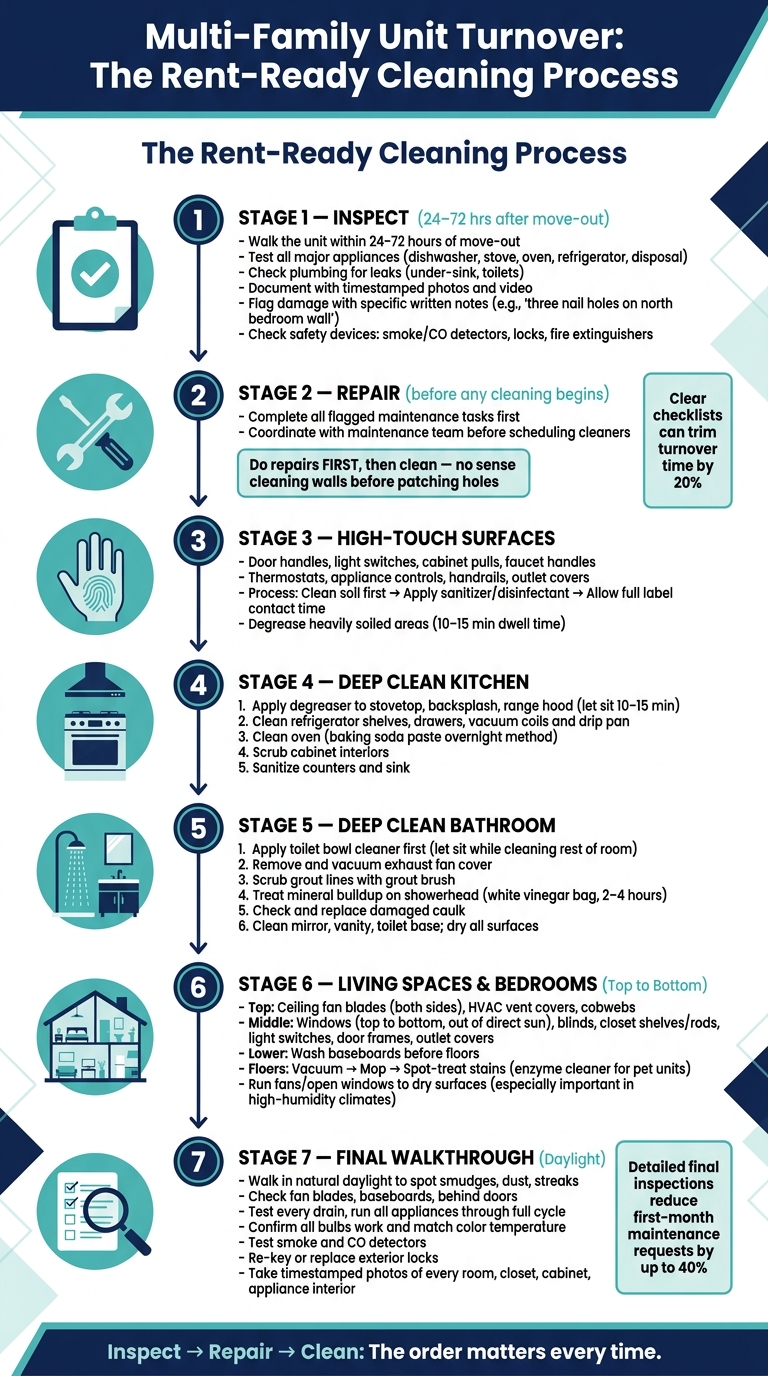
If you want a unit to be rent-ready, the order is simple: inspect it, fix it, then clean it. That one change helps teams avoid rework, keep standards the same across units, and cut early maintenance issues. In apartment complex buildings with many turnovers at once, a clear checklist can trim turnover time by 20% and lower first-month maintenance requests by up to 40%.
Here’s the short version:
- Inspect within 24 to 72 hours after move-out
- Document damage with timestamped photos and video
- Finish repairs before any deep cleaning starts
- Clean first, then sanitize or disinfect
- Focus on high-touch surfaces every turnover
- Deep clean kitchens and bathrooms in a set order
- Work top to bottom in living areas and finish with floors
- Do a final daylight walkthrough and test appliances, plumbing, locks, and safety devices
A few points matter more in places like Jacksonville. With 117 rainy days per year and high humidity, missed cleaning steps can lead to mold, mildew, and odor problems faster than many teams expect.
This article breaks the job into a simple turnover flow so I can clean each unit the same way, spot missed items fast, and leave a clear move-in record.
Multi-Family Unit Turnover Cleaning Process: Step-by-Step Checklist
Prepare the unit before cleaning begins
Inspect the unit first. Then finish repairs before cleaning starts. That order keeps repair work from getting mixed into the cleaning process.
Inspect, document, and flag repairs before cleaning starts
Walk the unit within 24 to 72 hours after move-out. That window makes it easier to record the unit’s condition and, when needed, tie damage to the outgoing tenant.
During the walkthrough, test major appliances before the cleaning crew gets there. Run the dishwasher, test the stove and oven, check the refrigerator, and test the garbage disposal. Check toilets and under-sink areas for leaks too. If the disposal is broken or refrigerator shelves are damaged, mark those as maintenance issues, not cleaning tasks.
Your notes should be specific. "Three small nail holes on the north bedroom wall" is far more useful than vague wording if a deposit dispute comes up later. Use timestamped photos and video walkthroughs to record walls, ceilings, floors, and appliance interiors.
| Inspection Category | Key Items to Check | Documentation Method |
|---|---|---|
| Safety | Smoke/CO detectors, fire extinguishers, locks | Photo of test date or expiration label |
| Appliances | Function, interior cleanliness | Photo of interior |
| Plumbing | Under-sink leaks, water pressure, toilet seals | Video of running water and flushing |
| Structural | Ceiling stains, wall holes, floor warping | Close-up photo |
| Electrical | GFCI outlets, scorch marks, flickering lights | Written log of "Test" button results |
After you flag repairs, coordinate with maintenance before you schedule cleaning. As RealtyTimes puts it: "Do all your repairs FIRST, then clean. There’s no sense in cleaning walls if you’re about to patch holes and paint."
Remove trash and check safety
Before the cleaning crew enters, clear out trash and debris. Take photos of everything before disposal. Confirm that water, power, and HVAC are working, and record utility status.
Also check that smoke and carbon monoxide detectors work, locks are secure, and the lint trap plus the dryer vent duct leading outside are clean between tenancies to cut fire risk.
A simple room-by-room supply setup during the walkthrough can save time and cut extra trips. Once the unit is cleared and repairs are flagged, start with high-touch surfaces.
sbb-itb-73b3b1a
Start with high-touch and shared-contact surfaces
With repairs flagged and the unit cleared, begin with the spots tenants touch all the time: door handles, light switches, cabinet pulls, faucet handles, thermostats, appliance controls, handrails, and outlet covers. These are some of the first places tenants notice, and they often drive hygiene-related complaints.
Clean soil first, then sanitize or disinfect
Don’t skip the cleaning step. Wipe away grease, dust, and residue first. Then apply sanitizer or disinfectant and leave it on for the full label contact time.
For heavily soiled areas like stovetop knobs or range hood controls, use a degreaser and let it sit for 10 to 15 minutes before scrubbing. During turnover, professional property managers also recommend using disinfectants approved for the surface on high-touch areas to cut down on hygiene-related complaints.
High-touch vs. low-touch surfaces: cleaning frequency comparison
Not every surface needs the same level of attention during turnover. High-touch surfaces should be cleaned and disinfected every time. Low-touch surfaces still need a full wipe-down, but they don’t carry the same hygiene risk.
| Surface Category | Examples | Turnover Frequency | Primary Action |
|---|---|---|---|
| High-Touch | Door handles, light switches, faucet handles, thermostats, appliance knobs, cabinet pulls, handrails, outlet covers | Every turnover | Clean soil first, then sanitize or disinfect |
| Low-Touch | Baseboards, ceilings, window tracks, HVAC vent covers, closet interiors, walls | Every turnover | Dust and wipe with mild detergent |
| Shared-Contact | Entry keypads, mailroom handles, laundry room controls | Daily (common areas) | Sanitize or disinfect |
Once the touchpoints are finished, move into kitchens and bathrooms, where grease and moisture call for a different cleaning order.
Deep clean kitchens and bathrooms
Kitchens and bathrooms shape first impressions fast. They also tend to fail move-in inspections fast when the cleaning isn’t thorough. After you finish touchpoints, shift to these two rooms, where grease, residue, and moisture build up in all the places a basic wipe-down misses.
Kitchen cleaning order: appliances, cabinets, and food-contact areas
Start by applying degreaser to the stovetop, backsplash, and range hood. Let it sit for 10 to 15 minutes so it can loosen stuck-on grease.
Then clean the kitchen in a set order: degrease the stovetop, backsplash, and range hood; clean the refrigerator shelves and drawers; vacuum the coils and drip pan; clean the oven; then scrub cabinet interiors and sanitize counters and the sink. That order works because it keeps you from bouncing around the room and missing hidden grime.
For the oven, a simple mix does a lot of the heavy lifting. A paste of baking soda and water applied the night before and wiped clean the next morning handles most baked-on grime without harsh chemicals.
Bathroom cleaning order: toilets, tubs, tile, and drains
Put toilet bowl cleaner in first, before you touch anything else in the bathroom. Let it sit while you clean the rest of the room so the product has time to work without extra scrubbing.
Next, remove the exhaust fan cover and vacuum out the dust. This helps limit moisture buildup. Small step, big difference.
Then move to the shower or tub. Scrub grout lines with a dedicated grout brush. If the showerhead has visible mineral buildup, fill a plastic bag with white vinegar and secure it around the fixture for a few hours. This removes scale without replacing the fixture.
Check the caulk around the tub and tile too. If it’s peeling, cracked, or discolored, replace it. Damaged caulk is an inspection red flag.
Finish with the mirror, vanity drawers, and the toilet base area, then dry all surfaces.
Kitchen vs. bathroom cleaning priorities during turnover
Both rooms need a deep pass, but the trouble spots aren’t the same. Kitchens are usually about grease and food safety. Bathrooms are more about sanitization and moisture control.
| Feature | Kitchen | Bathroom |
|---|---|---|
| Primary Focus | Degreasing and food safety | Sanitization and moisture control |
| Common Problem Areas | Range hood filters, behind and under appliances, oven and refrigerator interiors | Grout lines, exhaust fan dust, behind the toilet base |
| Contact Time | Stovetops and range hoods (10–15 minutes); ovens (overnight) | Toilet bowls; showerheads and aerators (2–4 hours) |
| Inspection Red Flags | Food odors, greasy cabinet handles, crumb-filled drawers | Mildew, soap scum, hair in drains, water spots |
Once kitchens and bathrooms are finished, move to bedrooms and living areas from top to bottom.
Finish living spaces, bedrooms, floors, and the final walkthrough
With kitchens and bathrooms wrapped up, move through the rest of the unit one room at a time. At this stage, the job shifts. You’re no longer dealing with grease and heavy moisture. Now it’s about dust, small marks, and the little details people notice right away.
Work top to bottom through rooms and finish with floors
Start high and work down. Wipe both sides of ceiling fan blades, remove HVAC vent covers, vacuum out lint and dust, and clear cobwebs from corners. Then move to the windows. Clean the glass from top to bottom with a microfiber cloth or squeegee. If you clean windows out of direct sun, you’ll have a much better shot at a streak-free finish. Dust or wash blinds, then leave them in the lowered and fully open position for the final showing.
Next, handle the middle surfaces. Wipe closet shelves and rods. Clean light switches, door frames, and outlet covers. After that, wash baseboards well before you touch the floors. That order matters. If you do floors too early, dirt can end up right back where you started.
For floors, vacuum first to pull up loose grit. Then mop hard surfaces and make sure no film, streaks, or pooled water are left behind. Spot-treat stains with an enzyme cleaner, especially in pet-friendly units. Melamine foam sponges work well for scuffs along floor edges. When cleaning is done, run fans or open windows to help surfaces dry faster and reduce the chance of mold. That matters even more in Jacksonville, where the city averages 117 rainy days per year.
Complete a final walkthrough with photos and rent-ready criteria
Once the last surface is dry, stop cleaning and switch into inspection mode. Go room by room and check that the unit meets rent-ready standards. Do this walkthrough in daylight so smudges, dust, and streaks are easier to spot.
Look up at fan blades and down at baseboards. Check behind doors too. Those are the places people miss most often. Test every drain to make sure water flows the way it should. Run all appliances through a full cycle. Confirm that every light bulb works and that the bulbs match in color temperature. Make sure smoke and carbon monoxide detectors are working, as required under Florida Statutes 553.883 and 553.885. Before the new tenant moves in, re-key or replace exterior locks.
Take timestamped photos of every room, plus the inside of closets, cabinets, and appliances. It may feel like extra work, but it can save a lot of trouble later.
"A professionally documented move-in inspection, backed by timestamped photos or video and a tenant’s signature, can save a landlord anywhere from $500 to $5,000 or more when a dispute lands in small claims court." – Innovative Realty LLC
| Rent-Ready Check | Standard |
|---|---|
| Windows | Streak-free glass, clean tracks and sills, screens intact |
| Lighting | All bulbs working, matching color temperature, covers dust-free |
| Safety Devices | Smoke and CO detectors tested and operational |
| Plumbing | No leaks under sinks, drains clear, toilets and faucets functional |
| Locks | Re-keyed or replaced between occupants |
| Appliances | Deep cleaned inside and out, all cycles tested |
Conclusion: Key steps for consistent multi-family unit cleaning
Once your turnover process is set, the next job is doing it the same way every time.
For multi-family cleaning, the order matters: inspect first, repair second, clean third. If something needs fixing, handle that before cleaning. Otherwise, you risk doing the same work twice.
When it’s time to clean, start by removing dirt and grime. After that, sanitize or disinfect high-touch surfaces. In kitchens and bathrooms, finish those spaces first, then move through the rest of the unit from top to bottom.
Before move-in, do a final walkthrough in natural light. Test appliances, faucets, and safety devices. That last check can save a lot of headaches. Landlords who use a detailed final inspection checklist can reduce first-month maintenance requests by as much as 40%.
It also helps to take timestamped photos of every room, cabinet, and closet. That gives you a clear move-in baseline and helps keep standards the same across units.
When the process stays consistent, turnovers get faster, units look cleaner, and it’s much easier to back up the condition of the space. That’s what keeps each unit rent-ready.
FAQs
How often should common-area touchpoints be disinfected?
Disinfect common-area touchpoints based on foot traffic. Clean high-touch surfaces like door handles and elevator buttons every day. Less-used areas can be cleaned weekly or monthly, depending on how often people use them.
For move-in or turnover cleaning, disinfect high-touch surfaces such as doorknobs, light switches, thermostats, and countertops. That helps support a healthy space for new residents.
What should I do if I find mold or mildew during turnover?
Treat it as a moisture problem. First, stop and document the condition. Then check where the water is coming from and fix the cause before you do anything else, whether that’s a leak, condensation, or poor ventilation.
After that, remove or replace damaged porous materials, and clean and sanitize the area the right way. If the mold growth is extensive, bring in licensed mold remediation professionals.
Act fast. Dealing with it right away can help prevent health problems and habitability issues.
What should be included in a rent-ready final checklist?
A rent-ready final checklist should include:
- A room-by-room walkthrough and full cleaning, with extra attention to high-touch surfaces, vents, and fixtures
- Checks to make sure lights, HVAC, plumbing, smoke/CO detectors, and other safety items work as they should
- Condition checks for walls, floors, windows, appliances, and any exterior areas the tenant can access
- Dated photos or video, plus notes and records for any repairs or replacements finished before move-in